Friday, January 15, 2010

Craft: Valentine's Day Garland

I decided to make another Valentine's Day craft - I've already hung up the garland because I was so happy with how it turned out.

I got the idea from this garland and used this paper for the hearts.

Supplies: Heart template, paper, scissors, sewing machine, thread
Cost: $0 if you already have paper

First I printed the patterned paper.


Then I cut out each separate square.


I printed the outline of a heart on card stock and cut it out. I used that as a template and traced four hearts on the back of each square.

I cut out all of the hearts.
 The hearts were sorted by pattern and I decided the order I wanted them on the garland.
I put white thread into my sewing machine and just sewed the hearts together.

I hung one in our kitchen, near the window, and one on a frame in our living room.
 

It turned out far better than I thought it would and I was so impressed and excited at how nice they looked that I made 7 strings of garland...yes, 7. :-\ I made two for my casa and a set to mail each of my sisters and to give to three friends.

I wrapped the garland around a 1/4 of a piece of card stock to mail it.
I loved this so much I might try to make similar garland for different holidays. I think the garland will last and I will be able to use it for future Valentine's Days if I make sure to pack the garland carefully.

PDF Tutorial 

Featured on:


Wednesday, January 13, 2010

Craft: Valentine's Day Candle Wraps

After putting away my my Christmas candle wraps I decided to make some for Valentine's day. I plan on putting them on our dinner table as decoration for a romantic dinner. :-)

Supplies: Paper, scissors, tape, battery operated tea-lights, paper cutter
Cost: $0 (I already had the tea-lights and paper)
I printed the design onto regular office paper (a PDF to download the candle wrap design and the tutorial in a pdf can be found at the bottom of this post)

I cut the paper in half.
I trimmed the white edge off of the top.
Then I cut at the top of each border. With each page you are able to make six candle wraps.
Next I wrapped one paper around the candle I was using to get the exact size I needed for the wrap. I used basic battery operated tea-lights and trimmed each wrap down to 4 1/2'' long.
This step can be skipped. If you want you can just wrap the candle and tape (on the inside) the paper. You will end up with a small overlap.
If you trim the paper down to the exact size it will look like this.
After trimming down the paper, wrap it around the candle and tape the edges on the inside. I usually used three small pieces of tape - one for the top, middle and bottom.

After taping it will look like this:
The inside will look like this.
The finished project!
Here are some close-up photos (shows front and back). The first two have the candles turned on, the second two have the candles turned off.


You can download a PDF for the designs here:
Valentine's Day Candle Wraps 1
Valentine's Day Candle Wraps 2
Valentine's Day Candle Wraps 3

PDF Tutorial


oneprettything
*The images for the candle wraps are from Microsoft Clipart*

Tuesday, January 12, 2010

Update: PDF for Christmas candle wraps

I have created a PDF to make these Christmas candle wraps.

You can access the PDF at the bottom of the original post.

Monday, January 11, 2010

Green Craft: Cloth Snack Bag

In the past we've bought small bags of crackers or pretzels at Costco to bring for lunch. The little bags end up in the trash and ends up producing a lot of garbage. So, in my quest to be more environmentally friendly, I've put a stop to that. We are going to buy big bags/boxes of crackers/pretzels and put them in reusable bags.

Last night I made a reusable cloth bag. I'm going to make more in various sizes so we have plenty of snack bags to use and won't need to buy individual snack bags.

I had a pillow case that we were going to get rid of - someone a pen exploded on it and it had a big blue spot on one end. Ruined pillow case = cloth snack bag. :-) I used a hair binder and a button that I already had. I did not have to buy anything for this project - I love crafts like that.

Cloth snack bag tutorial.

Supplies: fabric, button, hair binder, thread
Cost: $0 (I already had everything)


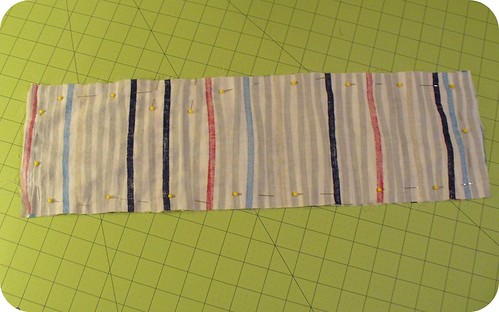
 I cut two pieces of material 20'' by 6.5'' and pinned them together - right sides facing each other.

I sewed around the edges (1/4'' seam allowance) and made sure to leave a hole to turn it right-side out.
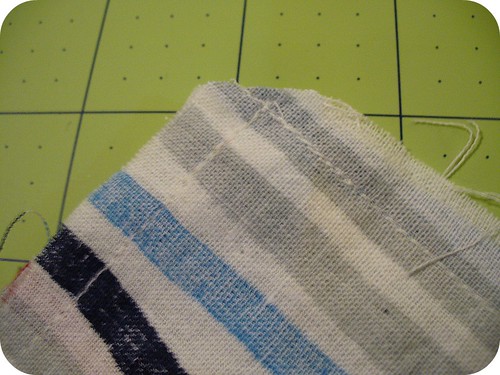
When I finished sewing I trimmed the corners.
Then I flipped the bag right-side out using the hole that I left open.
I used my handy chopstick to make sure the corners were pushed out all of the way.
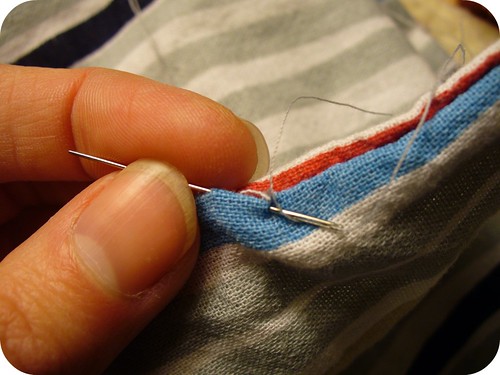
I closed the open part up with a slip stitch. I used this video to learn how to do the slip stitch.

All sewn up.

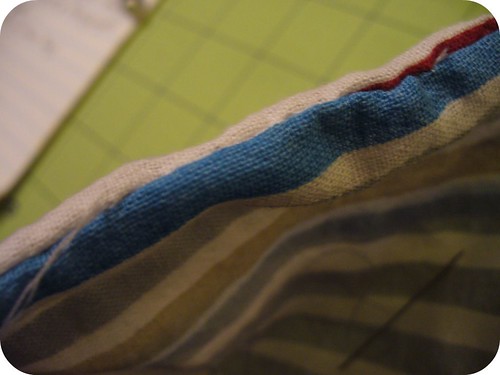
Next I took one end and pushed it through to the other end...explaining things like this is not my forte so bear with me. :-\ Lay the piece flat. Take the top edge. Pull the two pieces of material away from each other on the body of the bag and push the top edge down so that it goes into the bag and meets up with the bottom edge. Basically I made it so that I had a pocket with a lining - the lining and outside were both the right sides of the fabric and it looked like this. Does that make sense..?
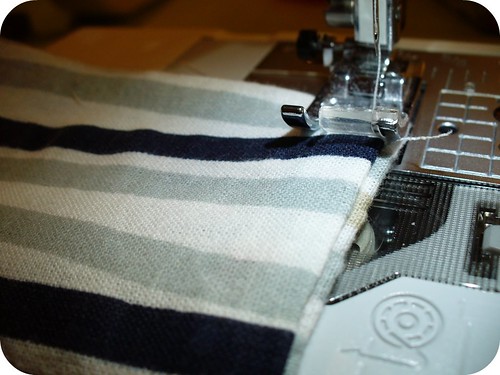
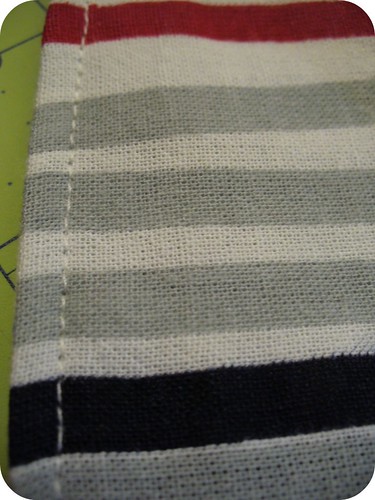
To keep the two layers together (and because I like how it looked) I sewed around the three edges (but not the opening at the top).
It looked like this.
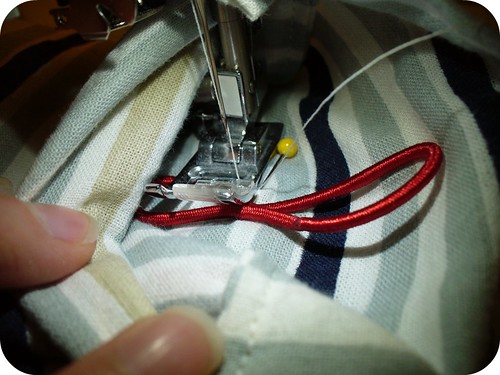
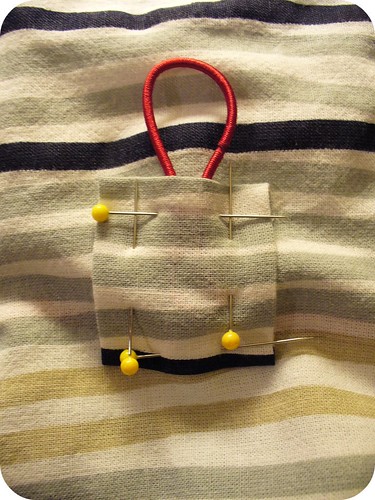
Next I took my button and hair binder and figured out where I wanted to put them.
I rolled down the top edge as far as I wanted it to go and then pinned on the hair binder. I pinned the button in place so that it would match up with the hair binder.

Then, I sewed the hair binder in place.
I tried a few stitches - I did a regular stitch and a zig-zag stitch. I didn't care how it looked, I just wanted the hair binder to stay.
To hide the ugly stitching I cut another piece of fabric, just big enough to cover the bottom half of the hair binder. I folded the edges over 1/4'' and ironed them down. Then I pinned it in place and sewed it on.
I sewed a zig-zag stitch around the edges.
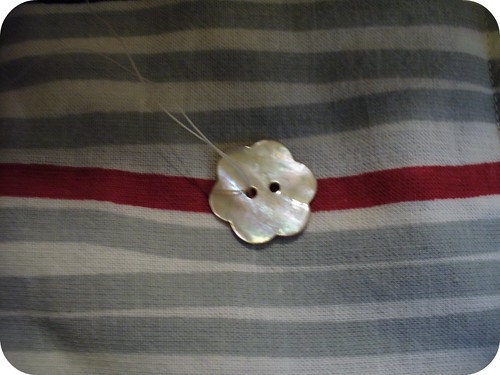
Next I sewed on the button.
All done!
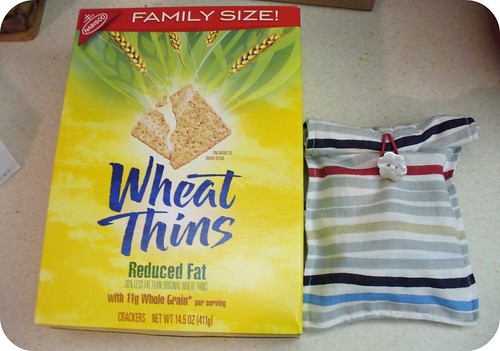
 I filled it up with wheat thins to bring to lunch.
It turned out great and I've been using it for lunch. I plan on making a few more in various sizes for different snacks.

Thursday, January 7, 2010

Green: Laundry

Here are some simple steps that I take to green my laundry. I'd love to hear your tips - please share them in the comments section!

1. Vinegar!
I use vinegar as a fabric softener. You can either put it in a downy ball (fill to the line) or you can pour it into the spot for fabric softener in your washer. I put in about 1/2 a cup of vinegar into each load. Don't worry about trying this - my clothes do not smell like vinegar! :-) I buy big containers (for cheap!) at Costco and pour it into a smaller container that I keep in my laundry room - it's much easier to pour from the smaller container.


2. Hang Dry Clothes
Right now I don't hang dry everything but I'm going to make an effort to do so. I currently hang dry almost all of my clothes but machine dry my pajamas, t-shirts and all of N's clothes. I bought this rack at Target to hang dry my clothes. I've had it for over 5 years now and have never stopped using it.


Just this week I made a clothesline to hang dry smaller things like socks. I attached a rope to one wall of my laundry room and then hammered a nail into a wooden beam on the opposite wall.

I stretched the rope across the room and made a loop at the end. This way I can take down the rope when I'm not using it. I used this for the first time last night and it worked great. I had some clothes pins for undershirts and I just hung the socks over the rope. Last night was the first laundry load (first of many!) that I did without using the dryer at all. We can use this clothesline for napkins, dishtowels and rags as well.

As a reminder to hang dry clothes I taped this picture on my dryer.


3. Green detergent
I make sure to buy green laundry detergent - without all of the chemicals in regular detergent. I look for detergent that is phosphate free - this is better for me and for the environment. I am currently using a detergent that I bought from Trader Joe's.


4. Wash in cold water
The only loads I ever wash in hot water are towels, cloth napkins, sheets and rags. I wash everything else in cold. This means that less energy (and money) is spent heating water.

5. Wash on "quick load"
With my washer I can do either a quick load or a regular load. Unless I'm washing a really dirty load, I wash my clothes on "quick load". This has less rinse cycles so it uses less water.

6. No dryer sheets
Dryer sheets are loaded with chemicals that are bad for both you and the environment. Another option is to use dryer balls - you can buy them at most stores (Target, Bed Bath and Beyond, etc.). There is debate as to the use of the plastics in dryer balls (see here) so another option is wool dryer balls. There are many people that sell these on etsy.com.

LinkWithin

Related Posts Plugin for WordPress, Blogger...