Showing posts with label valentine's day. Show all posts

Friday, July 22, 2011

Inspired readers

This post is far far overdue.

Two readers were inspired by my heart wall art and sent me photos of their projects. I'm too embarrassed to say exactly how long ago they sent me these photos...but it's been a while. 

And of course this post would have been great around Valentine's Day (since both readers did their projects for Valentine's Day...) but time has escaped me and here I am posting heart projects in July. The end of July :-)

Tonya created her own version of the heart wall art for her two kids.

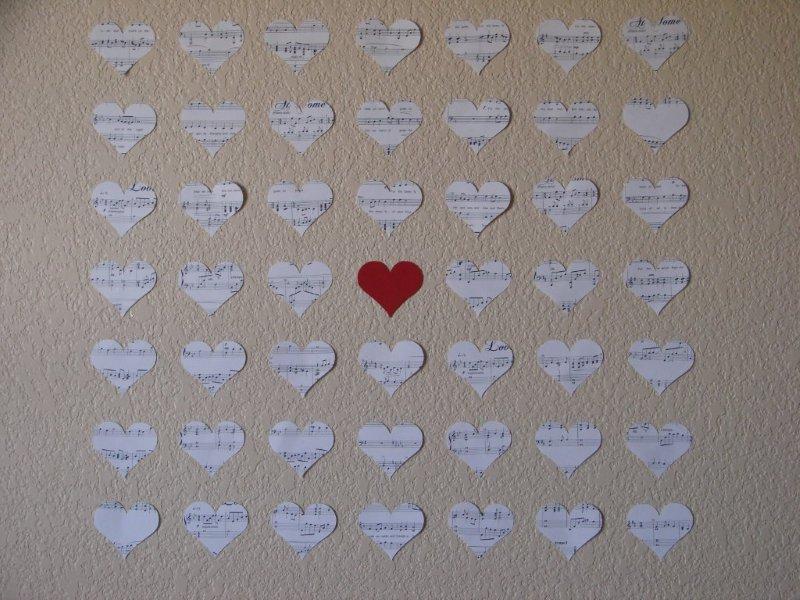
For her daughter she did sheet music with a red heart in the middle. 
For her son - she printed off schematics for a computer and used a blue heart.
Here's a close up shot of the hearts.
Both of her kids loved their heart wall art!

Annette made a mini version in a photo frame. She used photos for the main hearts and then added a coloured heart. I love how the black and white photos look on the pink paper.


P.S. Have you made any of the projects that I've posted? If you have - I'd love to see them. You can send either photos or a link to a blog post. There's a "contact me" link in the upper left or you can just e-mail me at secretpieshoppe at gmail.com

Sunday, February 14, 2010

Happy Valentine's Day! Treats!

Happy Valentine's Day!

What are your plans for Valentine's day? N and I are planning on going to dinner and a movie tomorrow. There is a great theater near us that serves food while you watch the movie.

I got together with an amiga (you can see her blog here) the other day to bake some treats for Valentine's Day.

We definitely went over board with the amount of treats that we made! I went over to her house at 4:30 and left a little after midnight. We took a few breaks for grocery shopping and dinner but spent the majority of our time in the kitchen.

First we started making the cake balls from Bakerella. They were supposed to be made with red velvet cake but when we couldn't find that at the grocery store we bought devil's food cake instead. They turned out pretty good - very tasty. I think I just need to work on my dipping and decorating skills. :-) The recipe said it would make 45 - 50 balls....we made 84. That means we each got 42 each!

We covered half in white almond bark and half in chocolate almond bark.
We made some of the almond bark pink and tried to decorate them...


Censational Girl posted about making chocolate covered caramels and they looked amazing so we decided to make them. The original recipe was from Smitten Kitchen. After gathering all of the ingredients we realized that the original recipe was for salted chocolate caramels...not chocolate covered caramels. We decided to stick with the recipe and made chocolate caramels. They were interesting but good. N decided that out of the three treats I brought home these are his favourite.
The last thing we made were brownie/cookies. This recipe is also from Bakerella. The recipe called for regular chocolate chip cookies but when we didn't see that at the grocery store we decided to use oatmeal chocolate chip cookies instead. It turned out great and N and I have each had one as a breakfast dessert for the past two days. :-) Mmm.

Saturday, February 13, 2010

Valentine's Day - Chocolate of the Month Gift

N got me these pink roses a few days early so I gave his gift on Friday.
I tried to think of something N would really like for Valentine's day and I immediately thought about chocolate. He loves, loves, chocolate. 

I decided to get him a "membership" to a Chocolate of the Month Club. And by "membership" I mean... I'll be buying him a new chocolate bar at the start of each month for the rest of the year. 

When I gave him his first delivery with a chocolate bar for January and February he thought it was "the real deal" (a real chocolate of the month club) until he started reading my job answers to the frequently asked question page that was included in the envelope. :-)

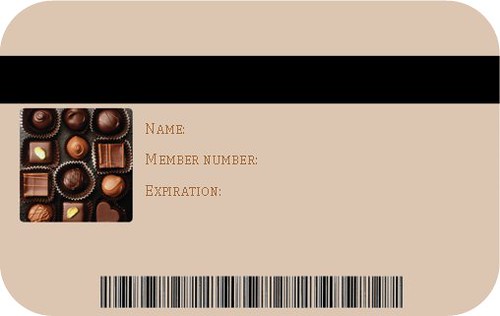
I designed a membership card and a punch card and laminated them both so they looked professional. Packing tape worked great for lamination. I used the font Nite Club which I downloaded from dafont.com.

Front of membership card:
 
Back of membership card:
Front of punch card:
 
I even put the months in Spanish on the back just for fun.
Next I made a welcome letter... (PDF of letter)
 and a page of frequently asked questions (PDF of frequently asked questions).
I put the letter, frequently asked questions, membership card and punch car in an envelope. 

I went to the co-op and bought the first two chocolate bars. I was holding a handful of chocolate bars trying to decide when a man came up and commented on how many chocolate bars I had. I explained that my husband has a chocolate problem (addiction) and I was buying him some for Valentine's Day. He laughed and recommended two bars. I thanked him for his recommendation and bought the two bars he suggested.

January's Chocolate bar
February's Chocolate bar
As an added bonus, this bar has a love poem inside. :-)
I put the bars in a box, wrapped it with a paper bag and put a sticker on it. 
Then I used ribbon to tie the box and envelope together to give to N. 
 He loved the gift and is excited to receive a new chocolate bar every month for a year. I'm excited for him to share the chocolates with me....:-)

I have uploaded the membership card, punch card and letterhead. For some reason the text on the membership card looks pixely...it didn't look like that before I uploaded it so I'm not sure what happened.

PDF of the letterhead.


nondepreciating

Monday, February 1, 2010

Craft: Valentine's Day Wall Art

I loved how my Valentine's Day garland and wreath looked so I decided to make another Valentine's Day decoration. In our living room we have a big blank wall that is patiently waiting for us to finish the wall art we plan on hanging. I decided to use that space and try to make a simple, cheap wall art.

Supplies: Card stock, pattern to print (I did sheet music), scissors, tape
Cost: $0  (I already had all of the supplies)

I started off by printing off sheet music. I printed two pages on each 8 1/2'' x 11'' sheet of paper.
Then I found a heart shape that I liked (via google images). I used this heart and edited the biggest heart in paint (very sophisticated...) so that I just had the outline. I made the outline light grey. I printed the hearts on the back of the sheet music - I was able to fit two hearts on each page of music so since there are two pages of music per sheet I was able to fit four hearts on each 8 1/2'' x 11'' page. I also printed out one red heart.

I cut out the hearts by hand - I'm very jealous of people with cricuts or other similar machines that do it for you. :-)
I had originally planned on just taping the hearts to the wall (I was going for very simple wall art) but decided it might look neat if the hearts stood a little bit off of the wall. To do this I cut out strips of paper that were 3.5'' long and 1/2'' wide. I folded the strips of paper so that it would create a little square - each side was 3/4'' long and there was a 1/2'' overlap on one end - where I taped the square together. 

Does that make sense? no? Here's a picture that might help explain it. 
I printed the outline with the folding lines (light grey) onto card stock and cut them out.
I folded all of the strips of paper and taped them together.
Then I taped them to the backs of the hearts.
All of the hearts.
I laid the hearts on the floor to figure out the layout. I didn't keep track of how many hearts I made but when I decided to make 8 rows of 8 I magically had the exact number of hearts needed. :-)
Then I started the slow process of taping them all to the wall. I used a level to make sure the first row was straight and for the other rows I ued a mix of the level and just eyeing it.

All done!
 
(please ignore the cushions - we're working on making new covers but have yet to find a fabric we like)
A close up of the "3-D action"

I think it turned out great. It'll stay up until we finally finish the frames we are making for the ceiling tiles that we will hang on this wall.

After I take them down they'll be carelfully packed away until next Valentine's Day.

N liked this project and decided to make his own version for the basement.
(dark basements aren't the best for photos...)
Any Zelda fans? :-)

PDF Tutorial 

Craftster Best of 2010 Winner


oneprettything


Wednesday, January 20, 2010

Craft: Valentine's Day Wreath

Following this tutorial I made a red felt heart wreath. It was really easy to do but took a while. It didn't take too much concentration so I caught up on tv shows while I made it.

Supplies: 3/4 yard+ of felt, pins, foam heart, scissors, circle template, pen/pencil
I printed a 3'' circle onto card stock and used that as my template. I traced the circle onto the felt and cut out the circles. I used the entire 3/4 yard of felt and wish I had more so I recommend buying a full yard. After using up all of the felt I even cut out a handful of smaller circles from the scraps to help fill in the wreath.


I folded each circle in half and then in half again.
Then I put a pin through the bottom of the felt...
...and pinned it to the foam heart.
I didn't pin in any real order but I made sure to evenly pin pieces around the entire heart.
I had a scrap piece of red ribbon that I used to hang it. I just took the ribbon and pinned it to the back of the wreath.
Then I continued pinning on the felt. I pinned felt around the entire heart - making sure that the front looked the best. There are areas in the back that should have more felt but I'm not too worried about it.
All finished!

I hung it up in our living room.


I've also seen this style of wreath done as a round one for other holidays or general decor. I might make another one to hang up for Christmas or just to have up in general after Valentine's Day is over.

LinkWithin

Related Posts Plugin for WordPress, Blogger...