
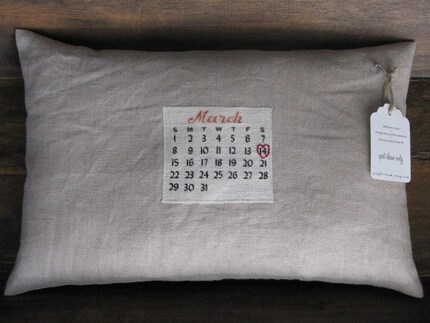
I saw this pillow and fell in love. I wanted it and thought it looked like something I could make myself. This photo has been saved in my always growing "to make" list and I finally got around to making it.
Supplies: Fabric markers (red and black), material (I bought .66 yards and had extra), calendar template, sewing machine, thread, zipper, pillow (12'' by 16'') or stuffing
Cost: $16.12
I already had the zipper. Fabric pens = $1.99 each. Fabric = $6.65. Pillow = $5.49
First I cut the fabric into four pieces.
16 1/2 x 12 1/2
16 1/2 x 6 3/4
16 1/2 x 6 3/4
6 x 6

I had never sucessfully sewn on a zipper before so I did not want the zipper to be at the seam on a side of the pillow. Instead, I decided to sew the zipper in the center of the back so it wouldn't be visible from the front.
I took the two 16 1/2 x 6 3/4 pieces of fabric and put them side by side. I put the zipper in the center and pinned it to one piece of fabric. After sewing the zipper onto that side I put the fabric side by side again and pinned the other side of the zipper to the other piece of fabric and sewed it on.

The zipper turned out okay but could have been better.
The back

The front

Next I sewed the sides next to the zipper together. The back of the pillow is done.
I used microsoft publisher to design a 5'' x 5'' calendar. I did the month and year of our wedding date and put a heart around the day we were married. I printed it off and got ready to trace it onto my 6'' x 6'' piece of fabric.

I taped the fabric over the calendar making sure that the calendar was centered. Then I put the paper/material over the screen of my laptop and started tracing. I opened up a blank document so the entire screen was white - this worked great and it was easy to see what I was tracing with the light from the laptop screen.

I was worried that I wouldn't be able to trace the calendar and have it look nice but I was pleasently surprised. I think it turned out great! It isn't exact but it still looks nice.

I folded the edges of the calendar material over 1/2 inch and ironed the edges down. Then I pinned the calendar to the center of the 16 1/2 x 12 1/2 piece of fabric.

I sewed around the edges of the calendar - as close as I could get.

Done with that part!

Now for the final part! I pinned the back (with the zipper) and the front (with the calendar) together - right sides together. I made sure to leave the zipper unzipped so I could turn it right-side out.

I sewed it together.

Flipped it inside out.

Put in the pillow and - ta-da! It's done!

I could not be happier with how it turned out (well maybe the zipper could have been better...)!
I set it on a bench in our living room and I think this is where it will stay.


That is very cute! Thanks for the tutorial!
ReplyDeleteWhat a cute idea! My sister is getting married in a few months and would love this.
ReplyDelete-Crystal
GASP! I love it.
ReplyDeleteYou should really consider selling these! I would buy one in an instant!
~Amy
This project is absolutely adorable! I want one too.
ReplyDeleteThanks for linking up to SNS!
FJ Donna
very cute idea. I like how you just traced the calendar. I never do projects with lettering and such because I'm afraid to experiment with printable fabric.
ReplyDeleteThat is soo cute! Love the idea!
ReplyDeleteI love this!
ReplyDeleteVery very cool idea! Your did a fantastic job! : )
ReplyDeletei love this pillow! very cute & unique. simply beautiful!
ReplyDeleteThat is so cute! I love the idea ... what a neat keepsake.
ReplyDeleteI love your idea
ReplyDeleteWhat a cute idea! I love it!
ReplyDeletewhat a cute keepsake idea!
ReplyDeleteI love this idea! I'm gonna make a variation for it for my aunt, her wedding is coming up she can't wait.
ReplyDeleteso cute! can you tell me which etsy shop this is from? sorry too many projects to actually make this one :P
ReplyDelete